
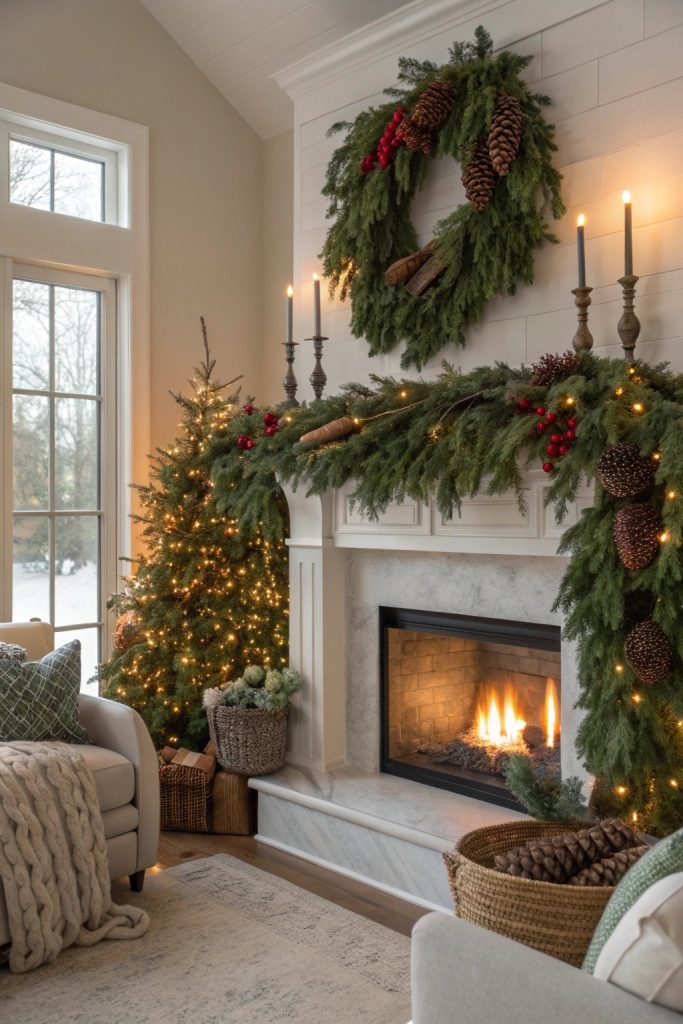
Last updated: October 2026
Short answer: the best DIY Christmas garland costs almost nothing. Free tree-lot clippings, a $1.25 roll of floral wire and 45 minutes beat most store strands — and nine builds below run $0 to $12 each, with real costs, lifespans and best spots.
A DIY Christmas garland is a decorative strand you assemble yourself — fresh greenery, dried fruit, faux branches or paper — sized to your mantel, railing or door frame. You control the length, the fullness and the budget. That’s the whole appeal.
This works best for indoor mantels, stair railings, door frames and table runners on a budget. It won’t help if you need a 40-foot outdoor installation or a commercial display. The guide covers nine indoor builds; it does NOT address large outdoor columns or fresh garland shipping.
Most people assume pre-made fresh garland at the craft store is the budget pick — the numbers say otherwise. It runs $3–$6 a foot, so a 9-foot strand hits $45 before a single bow. The clippings version below costs a roll of wire.
Here’s every DIY Christmas garland material in this guide, side by side:
Quick Comparison
| Option | Best For | Key Benefit | Limitation |
|---|---|---|---|
| Fresh greenery | Mantels, door frames | Real scent; $0–$2 from clippings | Dries out in 2–3 weeks |
| Dried fruit | Kitchens, trees | Stores flat for next year | Flammable — keep from open flame |
| Faux branches | Staircases, porches | Reusable for 5+ years | Needs fluffing tricks to look real |
| Paper & salt dough | Kids’ rooms, trees | Cheapest per foot | No water, no humidity, no flame |
How Much Garland Do You Need? Do the Math First
Measure before you make anything. Seriously — this step saves more money than any coupon, because garland regret means a second trip and a second strand you didn’t budget for. Two minutes with a tape measure gives you exact footage for any of them.
To measure for your garland, follow these steps: 1. Measure the span in inches. 2. Multiply by 1.5 for a soft swag. 3. Add 12 inches for hanging tails. 4. Round up to the next foot. 5. Make 10 percent extra for mistakes.
How much DIY Christmas garland does a 6-foot mantel need? Nine feet — the span times 1.5 — gives you one soft swag with short tails at each end. Want the deeper double swag in catalog photos? Budget 12 feet — plus a little extra, because corners, mistakes and one enthusiastic toddler eat length fast.
Railings lie to you. A staircase that looks like 10 feet measures closer to 13 along the slope, and each swag between balusters needs about 1.5 times its span — plan on 16–20 feet for a standard flight. Door frames are simpler: two heights plus the width, about 17 feet. Every DIY Christmas garland here uses that 1.5-times rule.
How far should a garland dip above a fireplace? According to the Illinois State Fire Marshal, sharing NFPA guidance, greenery should sit at least 3 feet from heat sources — and a heat source too close caused one in four Christmas tree fires. Measure to the lowest point of your swag, not the mantel edge.
Measure twice. Make once.
Fresh Builds: A DIY Christmas Garland That Smells Like the Tree Lot
Fresh greenery wins on scent and loses on schedule. Indoors, a fresh DIY Christmas garland looks its best for two to three weeks — less above a working fireplace — and asks for a quick misting every day or two. Build these in December, not November.
When should you hang fresh garland? According to the Illinois State Fire Marshal’s summary of NFPA guidance, dried-out greenery is a genuine fire hazard — and fresh garland dries on the same clock as a tree. Hang fresh builds in early December at the earliest, mist daily, and take them down once needles drop freely.
1. Free Tree-Lot Clippings Garland — About $1.25
Cost: clippings $0 (tree lots pile trimmings by the baler — ask, then take), floral wire $1.25. Time: about 45 minutes for 9 feet. Lifespan: 2–3 weeks indoors, misted. Best for: mantels and door frames.
Gather three or four clippings into a bundle and wire the stems tightly. Lay the next bundle over the wired joint so its tips hide the stems, wire again, and keep going in one direction. Overlap is everything. Build it on the floor, fluff the tips, carry it up in one piece.
Users who’ve built this one often report the free clippings outlast bagged store bundles by days — fresher cuts, less truck time. My pick of the nine, honestly. Free is free.
2. Eucalyptus and Pine Garland — About $6–8
Cost: one grocery-store eucalyptus bunch $5.99, free or $2 pine clippings, twine from the junk drawer. Time: 30 minutes. Lifespan: pine fades in 2 weeks; eucalyptus dries in place, still good at week six. Best for: stair railings and table runners.
Wire a slim pine base first, same overlap method as build 1. Snip the eucalyptus into 5-inch pieces and wire in small bunches every 8 inches, all angled one way. The silvery leaves do the decorating for you. No bows required.
Here’s the thing: eucalyptus is the cheat code of fresh garland. It starts pretty, dries pretty, and quietly covers the week-three moment when the pine underneath gives up.
Dried Builds: The Ones That Smell Like Christmas Morning
A dried DIY Christmas garland trades scent-by-the-week for patience: make it once in November and it hangs all season. The orange build is the one guests ask about; the popcorn one is the one kids help with.
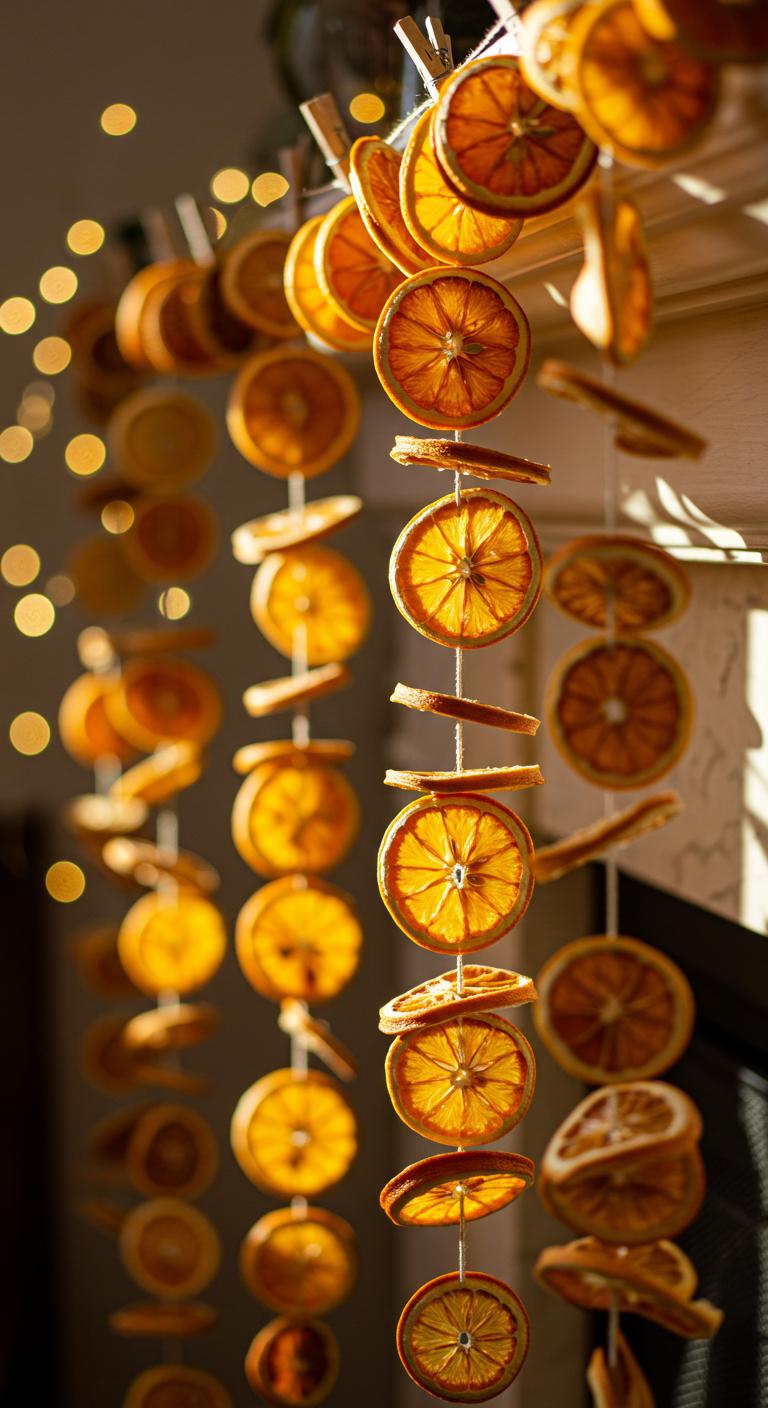
3. Dried Orange and Cinnamon Garland — About $6.75
Cost: 4 oranges $3.50, cinnamon sticks $2, jute twine $1.25 — makes about 6 feet. Time: 20 minutes stringing, plus 3–4 hours of oven drying. Lifespan: the whole season; stored dry, slices keep 1–2 years. Best for: kitchen windows, mantels, the tree.
Slice oranges a quarter inch thick, blot dry, and bake at 200°F for 3–4 hours, flipping hourly, until papery, not tacky. Thread twine through the flesh near the rind, alternating slices with a cinnamon stick every third or fourth piece. Tie off, hang, done.
One honesty note: a soft slice will mold in storage. Give it another hour in the oven — or eat the evidence and slice a fresh orange. Slightly over-dried beats slightly under-dried, every time. That amber glow is the same charm behind vintage Christmas decorations — just edible-adjacent.
4. Popcorn and Cranberry Garland — About $3
Cost: popcorn kernels about $0.50, a $2.50 bag of cranberries — roughly $3 for 8–10 feet. Time: 30–40 minutes. Lifespan: 1–2 weeks before it looks tired. Best for: the tree and kids’ rooms.
Pop the corn a day ahead. Fresh popcorn crumbles on the needle; day-old popcorn threads cleanly. Work in 3-foot sections — longer strands tangle and snap — with three kernels, a cranberry, three more kernels. Knot each section, then tie sections together on the tree.
Make this one the week of Christmas, not the week after Thanksgiving. By New Year it sheds — and that’s fine: hang it on an outdoor tree and the birds strip it in days.
Two weeks. That’s its season.
Faux Builds That Don’t Look Like Plastic Regret
Faux vs fresh, honestly: fresh is better suited to scent lovers and short seasons, because nothing matches real pine in December. Faux works better when you decorate in November or reuse for years. The key difference is lifespan — fresh fades in weeks, while a good DIY Christmas garland made from faux branches lasts a decade.
Some decorators insist faux garland always looks cheap. That’s valid for the shiny, sparse $5 strands — they do. But layered, fluffed and mixed with one real texture, faux fools almost everyone. And it never drops a needle.
5. Dollar Tree Double-Twist Garland — About $5
Cost: two 9-foot Dollar Tree garlands at $1.25 each, two berry picks at $1.25 — $5 total. Time: 15 minutes. Lifespan: 5+ years. Best for: porch rails and mantels.
Twist the two strands together in opposite directions so branches interlock, then bend every tip outward. Twisting doubles the fullness; fluffing hides the wire core. Wire berry picks in at thirds. It’s cheap, it’s fast, and you’ll wonder why you didn’t do it last year.
One store run can stock half your mantel — my Dollar Tree home decor ideas list covers the best finds.
6. Old Fake Tree Garland — $0 to $3
Cost: a tired artificial tree $0, a grapevine or wire base $1.25–$3. Time: about an hour. Lifespan: years. Best for: mantels and staircases.
Cut 30–40 of the fullest branch tips, 8–14 inches long, and fluff each one before it goes near the base. Wire tips along the base in one direction, overlapping like shingles, then fill gaps with short pieces. A tree nobody wanted becomes the fullest garland in the house.
Same rescue logic as my upcycled home decor ideas — the best material is headed for the curb.
7. Pool-Noodle Garland — About $7.50
Cost: pool noodle $1.25, four faux greenery picks $5, ribbon $1.25. Time: 25 minutes. Lifespan: years. Best for: mantel showpieces and door frames.
Push greenery picks into the foam at angles, alternating sides, until no foam shows. Wrap ribbon in a loose spiral over the joins. The noodle gives you that thick, $60-store silhouette for sandwich money — the viral fullness hack, and it genuinely works.
Quick note: pool noodles are summer stock at dollar stores, so grab two in July. In December, foam tubes online step in at about $3. Plan the cheap version ahead.
Paper and Dollar-Store DIY Christmas Garland Builds
Paper asks for scissors and patience. Or maybe I should say it this way: paper asks for scissors, patience, and respect for how fast it burns. A paper DIY Christmas garland weighs almost nothing, hangs on one adhesive hook, and costs less per foot than anything else here.
8. Paper Star Garland — $0 to $2
Cost: a cardstock pack $2 makes 12+ feet; leftover wrapping paper makes it free. Time: 30–45 minutes. Lifespan: a full season indoors, years if stored flat. Best for: kids’ rooms, door frames, the tree.
Fold, cut and glue simple 3D stars — or thread flat stars on twine with a dab of glue at each point. Space them a hand’s width apart. Uniform spacing makes paper look designed instead of improvised.
Spacing sells it.
9. Salt Dough Garland — About $2
Cost: flour and salt from the pantry, about $0.80 worth, plus $1.25 twine. Time: 20 minutes hands-on, 2–3 hours baking. Lifespan: years, if it stays bone-dry. Best for: the tree, kitchens, gift strands.
Mix 2 cups flour, 1 cup salt and 3/4 cup water, roll to a quarter inch, and cut stars and trees. Poke a hole in each before baking at 250°F until rock hard. Thread, tie, and store with a silica packet — humidity kills it.
I’ve seen conflicting advice on sealing salt dough — some makers swear by clear spray, others say it traps moisture and ruins pieces by spring. My read: in a humid house, seal it; in a dry one, skip it and store it well.
Hang It All Without Drilling a Single Hole
What most guides skip is the weight of a finished DIY Christmas garland. A wired 6-foot fresh garland weighs 3–5 pounds — triple a paper strand — and one heroic adhesive hook will not save it at 2 a.m. Support fresh every 2–3 feet, faux and paper every 3–4.
- Adhesive hooks: wipe the spot with rubbing alcohol, press, and wait a full hour before loading — that wait decides whether it holds or crashes.
- Garland ties or zip ties: on railings, loop loosely so you don’t crush branches or scratch paint.
- Over-door wreath hangers: perfect end anchors for door-frame garlands, zero hardware.
- Mantel clips and stocking holders: they grip the mantel edge and carry real weight without marks.
- Tension rods: inside a doorway or window frame, they hold paper and dried strands beautifully.
- Painter’s tape: paper garlands only. It will not hold greenery.
Look — if your staircase railing is the glossy, landlord-painted kind, here’s what actually works: garland ties padded with a strip of ribbon. Ribbon stops ties biting paint, and everything comes off in January, traceless.
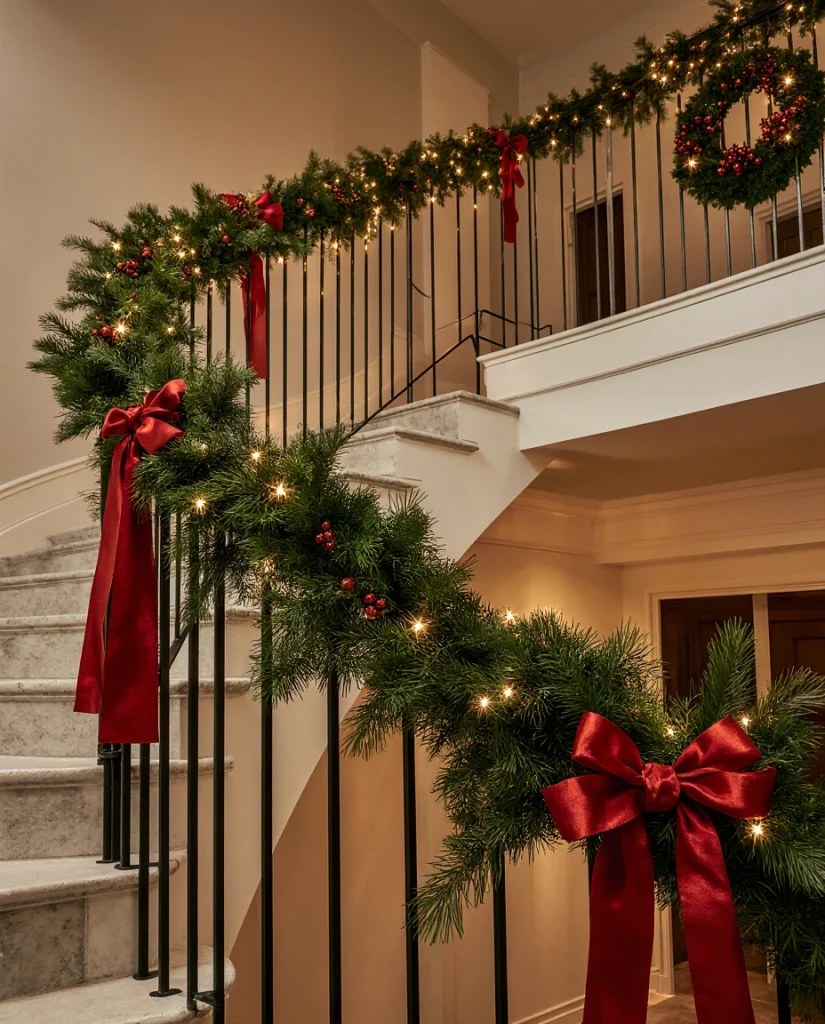
Taking a strand outside? My Christmas porch decor on a budget guide covers rails and columns built for real weather.
The Safety Talk: Greenery, Lights and Open Flame
Paper burns. Dried oranges burn. Popcorn, cinnamon, desiccated pine — everything here except the faux plastic is fuel once dry, and some of it starts dry. That doesn’t make it dangerous decor. It makes placement a real decision.
The numbers back the caution. According to the Illinois State Fire Marshal, citing NFPA research, electrical problems caused more than one in four Christmas tree fires, and a heat source too close caused one in four more. A DIY Christmas garland sits where those risks meet — near lights, near fireplaces.
- Keep all garland at least 3 feet from fireplace openings, candles, radiators and heat vents.
- Choose LED string lights for dried and paper builds — they run far cooler than old incandescent strands.
- Inspect every strand before it goes up; frayed cords and loose sockets get replaced, not forgiven.
- Switch lights off when you sleep or leave. Timers make this effortless.
Unpopular opinion: pre-lit garland is mostly a waste of money. The lights die years before the greenery, and you’re left untangling dead wire from good branches. Separate strands cost less and go where the garland needs them.
Questions People Actually Ask About Garland
What’s the best DIY Christmas garland for a small apartment?
The dried orange build. Six feet costs about $6.75, weighs almost nothing, hangs on two adhesive hooks, and stores in a shoebox. Fresh is prettier for two weeks, but orange wins on storage and zero watering.
How do I make a cheap DIY Christmas garland look full?
Twist two thin strands together, bend every tip outward, and add one bulky texture like pinecones or ribbon loops. Fullness is layers, not price — the pool-noodle build takes the same trick to the extreme.
Should I hang a fresh DIY Christmas garland over a fireplace we actually use?
Only if you mist daily and accept a shorter life — nightly fires dry fresh greenery in under a week. For a working fireplace, faux on the mantel, fresh on the door frame: smarter split.
Why does my fresh garland dry out so fast?
Indoor heat is the culprit — heating vents pull moisture from cut greenery day and night. Mist daily, keep it away from vents, and start with the freshest clippings you can find. Freshness on day one decides the lifespan.
When should I make a dried orange garland?
Early November. Slices need to be fully dry before stringing, drying takes an afternoon, and the finished garland stores beautifully — so November-you can hand December-you a finished decoration instead of another project.
If You Only Make One
Start with build 1 if you have a mantel — free beats everything. Start with build 3 if you want the one people photograph. And if December is already chaos, build 5 takes fifteen minutes and looks planned for weeks.
That’s it — nine builds, one roll of wire, zero store strands.
Pair any of these with the wider list of cheap Christmas decor ideas and the room comes together for under one store-bought wreath. That’s the real promise of a DIY Christmas garland: not the savings, the fit. Yours is exactly as long as your mantel.